Search  for anything...

Creality K1 3D Printer with 600mm/s Printing Speed 2000mm/s² Acceleration, 300℃ High-Temp 32mm³/s Flow Hotend Auto Level Dual-Gear Direct Extruder Printing Size 8.66x8.66x9.84 inch

  • Based on 4,101 reviews
Condition: New
Checking for product changes
$519.00 Why this price?
Holiday Deal · 4% off was $537.99

Buy Now, Pay Later


As low as / mo
  • – Up to 36-month term if approved
  • – No impact on credit
  • – Instant approval decision
  • – Secure and straightforward checkout

Ready to go? Add this product to your cart and select a plan during checkout. Payment plans are offered through our trusted finance partners Klarna, PayTomorrow, Affirm, Afterpay, Apple Pay, and PayPal. No-credit-needed leasing options through Acima may also be available at checkout.

Learn more about financing & leasing here.

Selected Option

Free shipping on this product
This item's return window has been extended for the holiday season: Returnable until Jan 31, 2025

To qualify for a full refund, items must be returned in their original, unused condition. If an item is returned in a used, damaged, or materially different state, you may be granted a partial refund.

To initiate a return, please visit our Returns Center.

View our full returns policy here.


Availability: Only 10 left in stock, order soon!
Fulfilled by Amazon

Arrives Tuesday, Dec 24
Order within 12 hours and 18 minutes
Available payment plans shown during checkout

Size: K1


Features

  • Faster and More EfficientThe Creality K1 3D printer features a printing speed of 600mm/s and 20000mm/s2 acceleration, making it 12 times faster than standard 3D printers. It delivers an exceptional printing experience and produces high-quality models in a shorter time.
  • Efficient PrintingWith a maximum flow rate of 32mm3/s, the K1 incorporates a new ceramic heater that surrounds the hotend, allowing it to reach 200C in just 40 seconds and melt filament instantly. Its maximum heating temperature is 300C.
  • Easy Start to PrintThe K1 offers one-tap self-inspection for effortless printing initiation. A strain sensor in the heatbed ensures precise auto-leveling without user intervention, significantly reducing setup time.
  • Dual-Gear ExtruderThe all-metal "Sprite" direct extruder features dual gears for smooth feeding, supporting a wide range of filaments, including flexible options like TPU. It delivers a powerful and uniform extrusion force of 80N for consistent filament feeding.
  • Upgraded DesignThe K1 supports printing via USB drive or LAN, accommodating various customer needs. A smart G-sensor minimizes ringing during high-speed printing, while accurate Z-axis positioning reduces Z-banding. Dual fans with directional air ducts and an auxiliary fan in the build chamber ensure effective cooling of printed models.

Brand: Creality


Material: Steel


Product Dimensions: 10"D x 10"W x 10"H


Item Weight: 12.5 Kilograms


Compatible Devices: Personal Computer


Global Trade Identification Number: 24


Brand: Creality


Manufacturer: Creality 3D


Compatible Devices: Personal Computer


Enclosure Material: Steel


Item Weight: 12.5 Kilograms


Item Dimensions D x W x H: 10"D x 10"W x 10"H


Frequently asked questions

If you place your order now, the estimated arrival date for this product is: Tuesday, Dec 24

Yes, absolutely! You may return this product for a full refund within 30 days of receiving it.

To initiate a return, please visit our Returns Center.

View our full returns policy here.

  • Klarna Financing
  • Affirm Pay in 4
  • Affirm Financing
  • Afterpay Financing
  • PayTomorrow Financing
  • Financing through Apple Pay
Leasing options through Acima may also be available during checkout.

Learn more about financing & leasing here.

Top Amazon Reviews


  • Beginner Friendly, Great Value, Impressive Prints, Large Community of Support
Size: Ender 3 Pro
= What I Wanted As I am new to 3D printing, I wanted something that: - Easy to setup and get going on - Sufficiently capable to avoid quickly "outgrowing" it - Affordable (<$300) = Why I Choose the Ender 3 Pro I was torn between the Ender 3 and the Ender 3 Pro. I settled on the Pro, as I figured that the Pro represented the best and most refined version out-of-box. The Ender 3 is a tried and true model with it's strengths and weakness well known. There are numerous howtos available on how to address the various short comings of the Ender 3. However, several of the enhancements offered by the Ender 3 Pro are either more difficult or cost - approaching or exceeding the cost differential between the 3 and 3 Pro. For example, the upgraded (sturdier) Y-axis base is more difficult to do on your own and requires significant disassembly and reassembly. The upgraded PSU is nearly the cost difference alone and results in an unused item in your drawer that you paid for. = Out of the Box Experience The printer was easy to assemble and worked well without any modifications. It is critically important to get the bed "level" - not as in bubble level but as in consistent height from the extruder nozzle (I used the paper method). It is also important to make sure that the wheel/track assembles are straight and true with proper tightness. I found several helpful guide videos online for this specific model that do a good job of walking you through it. My device came with the latest FW at the time of writing (1.1.6.2), so I have no experience in FW flashing yet. I do plan on setting up an OctoPi/OctoPrint solution, but for now the including SDcard and adapter has worked fine. I've printed with both PLA and PETG and both come out surprisingly well in my opinion. I've been using the latest version of Ultimaker Cura at the time of writing (4.5.0) for slicing STL files. = Notes on Usage A note on print times. I have no experience from which to base my expectations on print times however, you do need to be patient as many prints can take 5, 10, 15+ *hours*. I haven't tinkered around much with the print settings to see how much of a reduction in time I can achieve and at what quality tradeoffs. Nor have I experimented much to see how print quality and time stacks up when printing multiple parts simultaneously versus multiple prints of singular parts. You should monitor your prints - initially to make sure it lays down a good first layer that adheres well and then periodically check on it to make sure it doesn't go awry. Also, make sure you have enough filament to finish the print and that you plan for the duration. Things like - Are you comfortable with it printing overnight or while you are away? - Will the printer be free from vibrations/bumps/drafts in it's location (e.g. dining room table) from foot traffic, AC vents, etc for the duration of the print? = Final Thoughts Overall, I've been very happy with this purchase and foresee a long service given it's performance, upgradability, and available of spares in case of part failure. ... show more
Reviewed in the United States on April 3, 2020 by Zach

  • Great Choice for First Printer!
Size: Ender 3 Pro
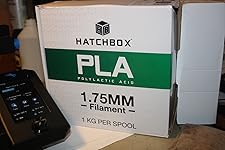
The media could not be loaded. This was my first step into 3d printing and I'm very much enjoying it! I did quite a bit of research before making my purchase. The product was packaged well and was fairly easy to assemble. I would suggest having plenty of YouTube videos on hand for setup and tweaking of the printer to get solid results. I needed to loosen the pre-assembled frame pieces to rid myself of a wobble in the base - easily done. I replaced the tubing to the hot-end and bought the glass bed from Creality. Overall, the experience putting it together was a good one with support from 3rd party YouTubers. For the printing, don't expect it to be totally plug and play out of the box. Think of it as a craft / hobby and you'll be delighted with the performance of this machine. With very small additions and adjustments that I learned from the 3d community, I have been able to print some great quality items! I use Hatchbox PLA exclusively and it has been wonderful. The first few days I printed with the included flexible plate. I liked the ability to easily remove printed pieces from it but I did have to spend quite a bit of time on leveling. My build surface is not perfectly level with the shipped machine. I purchased the glass plate to help with leveling and although that surface doesn't level perfectly either, I have found a good middle ground with great surface adhesion. I typically set my build plate temp at 70 degrees - which I think is slightly misleading based on the addition of the glass plate. I suspect the actual temp at contact is slightly lower but it works well! I intend to make some other adjustments over time - stepper motor dampers is next on my list. Overall, amazing machine for the price! Fun to work with and tinker with settings and customizations. Great value in my opinion. Quality output if you're willing to understand the nuances of the medium and technology. ... show more
Reviewed in the United States on August 27, 2019 by Erik Erik

  • I'm new and so far so good!
This is a really nice printer for a beginner in the 3D printing world. The key factor of operating this printer is really the firmware. I have had to swap 5 or 6 times before I found one that worked for me. It was a bit frustrating at first but once you understand how everything works and is supposed to be, it really isn't too difficult. Just be warned, there is a LOT of hands on maintenance involved in owning one of these. I recommend reading more on how they work before you decide to buy one. But if you do decide to get one, go with this one before you get a bigger one! The bigger ones I am told are harder to maintain if you are just starting off. Stuff to know What I recommend is using the professional firmware from mriscoc on github. It has a lot of options, tweaks, settings, and other stuff! However, you do need the upgraded LCD screen for it, so keep that in mind. (It should come with the one I reviewed.) You can get 3d prints from all different sources on Yeggi, it searches multiple different sites like Thingiverse. You can use Ultimaker Cura to slice the files to read on the printer, just make sure you set it to the Ender 3 V2 profile. Don't leave it unattended! If you have to leave it for whatever reason for an extended period of time, I would invest in octopi with an octoeverywhere link so you can watch it wherever you are. You can also use this to stream it to anyone else. Still, if you are going to print please please please be close by because these things could burn down your house if you aren't careful. I do not advise leaving the printer alone for long! ALSO, MAKE SURE YOUR POWER SUPPLY IS SET TO 115V AS OPPOSED TO 230V IF YOU ARE IN THE US. I forgot to flip the switch and it was giving me thermal runaway and nozzle too low temp errors, and it would mess up my print. Overall its a solid printer, nothing feels cheap and its very upgradable. Follow assembly carefully and watch a video guide if need be! Thumbs up, good luck if you get one! ... show more
Reviewed in the United States on October 23, 2023 by Nolan Morris

Can't find a product?

Find it on Amazon first, then paste the link below.